Bethsoft Tutorial Navmesh
[edit | edit source]
When an area has been built and cluttered, we need to determine where NPCs and creatures can navigate. This is where a navmesh comes in. Simply put, a navmesh is a collection of polygons that tells an actor where it can walk.
Here are a few pages you might want to reference during and after the tutorial, or in your further reading.
- Navmesh Overview - The Navmesh category has links to useful topics regarding navmesh.
- Toolbar - Information on what the different icons on the Main Toolbar and Navmesh Toolbar and what they do.
- Navmesh hotkeys - Useful Hotkeys while in navmesh editing.
- NavMesh Editing on Slow Machines - Help for those without the latest and greatest computers.
[edit | edit source]
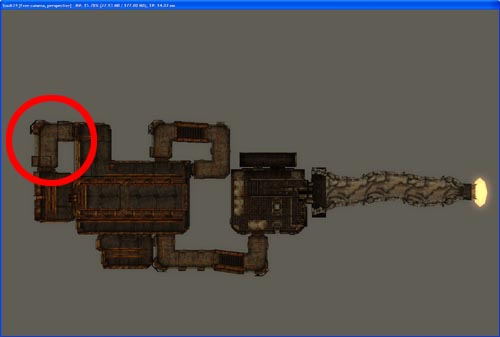
We're going to start in the simple hallway indicated at the northwest corner of Vault 74. The new navmesh editor is a fairly robust tool which introduces a lot of new functionality used for Fallout 3. This can be intimidating at first, so let's learn step-by-step how to get started with it. Once you've learned the fundamentals you'll be a navmesh expert in no time.
- To enter Navmesh Mode, click the Navmesh Button on the Main Tool Bar, or use the CTRL+E hotkey
- The Navmesh Tool Bar will appear.
- The only three buttons we need to worry about right now are the first three starting from the left.
- The far left button toggles Select Triangle On/Off
- The middle button toggles Select Vertex On/Off
- The right button toggles Select Edge On/Off
As you create and edit more and more navmeshes you will want to begin using Navmesh hotkeys instead of using the toolbar.
T toggles Triangle Selection On/Off
V toggles Vertex Selection On/Off
G toggles Edge Selection On/Off
Make sure you do not have Grid Snap on. You rarely, if ever, need it when navmeshing. If you need a refresher on snap to grid and camera controls, click here.
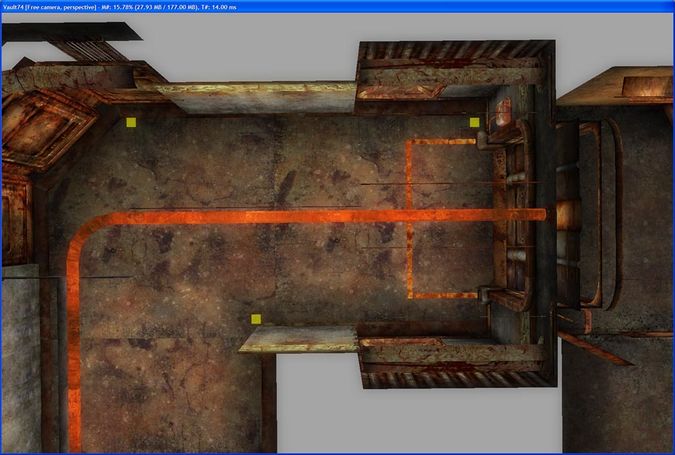
Toggle Vertex Selection. or use hotkey "V" and zoom into the top-left corner of the map. Right Click on the floor. Notice a vertex has appeared. Now create two more vertices using Right Click.
Navmesh editing uses a separate set of hotkeys than regular GECK editing. Some hotkeys you may be accustomed to, such as "T" for top-down viewing, are re-bound to new keys while editing navmesh mode.
Notice the colors of the vertices you've created. Green indicates that a vertex is currently selected. Yellow vertices are unselected, and not part of any triangle. Vertices that are part of a triangle render Red. Yellow vertices serve no purpose and can be safely deleted if any are left hanging around a complete navmesh.
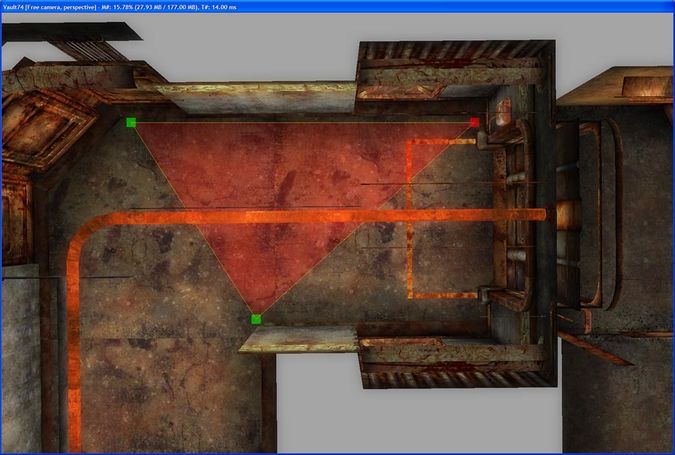
To create a Triangle, select all three vertices by using CTRL+Left-Click or marquee select them by Left Click and drag. The selected vertices should be green. Press "A" or use ![]() to create a triangle from the three vertices.
to create a triangle from the three vertices.
Notice that two vertices remain green/selected after creating the triangle. This makes it easier to create subsequent triangles. With two vertices selected, all you need to do to create another triangle is CTRL+Right-Click. A new vertex is created where you click and automatically creates a new triangle.
[edit | edit source]
Navmesh Tutorial Video(part 1) at YouTube
Now that we have our first triangle, we need to fill up the rest of this hallway with other triangles. The easiest way to do this is to select two vertices and then use CTRL+Right-Click to place a vertex, automatically creating a triangle between the two selected vertices and the newly-placed one.
Notice that once the new triangle is created, two vertices remain selected/green. Simply use CTRL+Right-Click to create another triangle. With practice, you can get into a rhythm and be able to fill up spaces quickly just by holding CTRL and Right Clicking. Go ahead and fill up the rest of the hallway as pictured in Fig 1a below.
With this technique, you can create triangles very quickly and cover a lot of ground by simply using CTRL-Right Click. We fondly call this technique "Walking the Dog".
Now that the hallway is covered, we need to prep the navmesh to extend through the doors. We don't have to worry about setting up something special for doorways, the navmesh takes care of it for us. Simply continue creating triangles as if the door isn't even there.
If you've created a navmesh like the one above, then we need to create vertices on the edges near the doorways so we can continue creating triangles for the rest of the level. To do this, toggle Edge Selection on with ![]() or the hotkey "G". Notice that whenever you mouseover an edge, it highlights dark red. Right Click on an edge and a vertex will be created on that edge. In Fig 1b below, if you look closely you'll notice four new vertices. Two at each edge, from which we'll build further triangles through the doorway.
or the hotkey "G". Notice that whenever you mouseover an edge, it highlights dark red. Right Click on an edge and a vertex will be created on that edge. In Fig 1b below, if you look closely you'll notice four new vertices. Two at each edge, from which we'll build further triangles through the doorway.
Doors, like objects with the "obstacle" tag, automatically cut the navmesh in game for us so we don't need to do anything special for them.
If you're having trouble seeing your navmesh you can try one of the three Navmesh modes: Normal, Transparent, Navmesh Only. Press 'W' to cycle through the three different modes, or use the toolbar buttons

[edit | edit source]
Navmesh Tutorial Video (part 2) at YouTube
With this hallway done, you know the essentials and are equipped to continue navmeshing Vault 74.
- For stairs, create an edge at the top of the stairs, and another at the bottom. Double click the edge at the top, then the one below while holding CTRL. Two triangles will automatically be created, bridging the gap.
- Try experimenting with the three different view modes to see which one you prefer in different situations. To cycle through the view modes, press "W" or use the toolbar buttons


- If you've created a triangle you do not like and need to delete it you can toggle Triangle Selection on (or simply press 'T') and select the offending triangle and press DELETE. You can also undo a change you've made with CTRL-Z.
- Try using the hotkeys for toggling Triangle, Vertex, and Edge Selection on/off as much as possible, it will save you a lot of time in the long run (T, V, G respectively).
- You'll occasionally need to merge multiple vertices into a single vertex. To do so, select two or more vertices and press Q or
 , and the vertices will merge to the first selected vertex.
 - Double-Click an edge (with Edge Selection turned on) to quickly select it's two vertices.
- Remember how two vertices remain selected after creating a triangle? You can cycle through which two vertices you want selected by pressing TAB.
- You can press R to delete selected objects if you don't want to reach across your keyboard and hit the DELETE key.
- Strive to create triangles as close to equilateral as possible. These play nicely with the in-game pathing. Long, thin triangles are to be avoided. Use edge-rotating with hotkey "S" or
 to achieve a more ideal result.
 - Balance is a useful, automated recalculation of your navmesh edges and triangles. Perform the pass with
 or the hotkey "B". This pass is best used early, as it will negate any cover or finalize data in your navmesh, and some small details can be lost by the pass. You should always carefully review your navmesh after a balance pass.
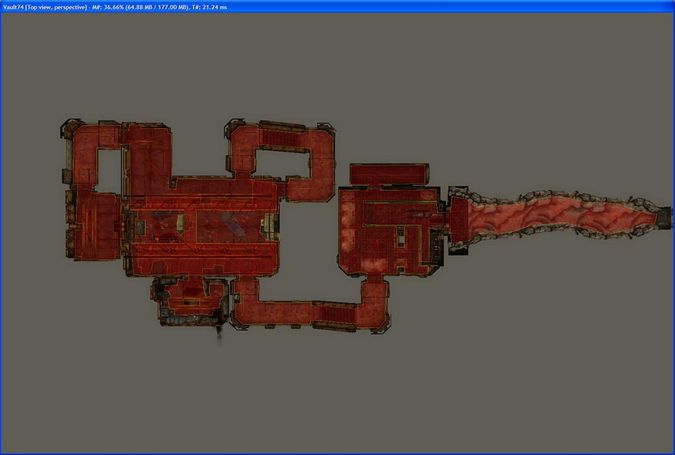
This is what the navmesh should look like after you're done creating it by hand. Your navmesh won't look exactly like the one below, but overall, they should look similar.
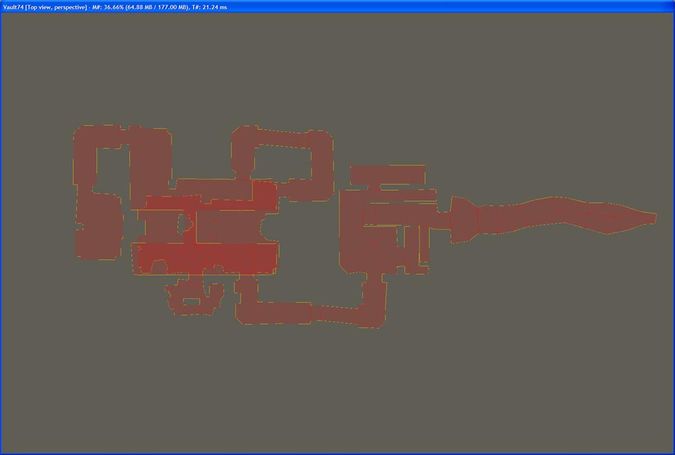
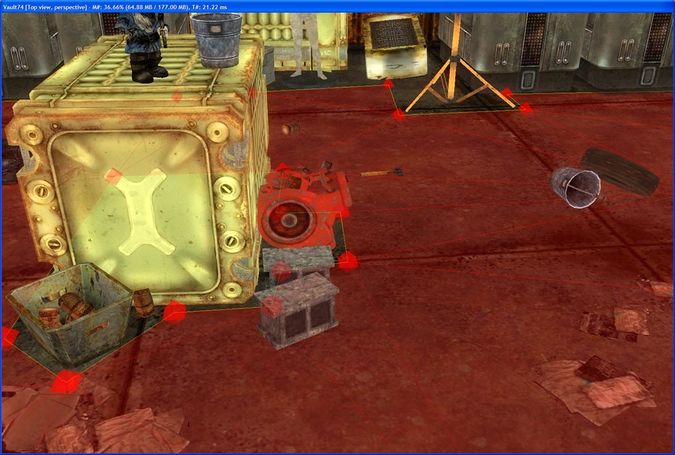
Here is what the navmesh should look like near the cluttered areas of the level. Notice that the navmesh goes under Havok (moveable) objects. You never need to navmesh around a Havok object, the navmesh takes care of it during runtime. In the example below, the Havok objects in the scene are the cinder blocks, tin cans, tire, and bucket. Notice the navmesh goes underneath these objects. The red engine and the plastic box are not Havok objects and therefore we need to navmesh around them.
[edit | edit source]
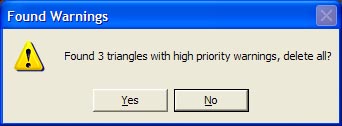
You will know when you have an error in your navmesh when you save your plugin. If you have an error and save your plugin, a warning like this pops up:

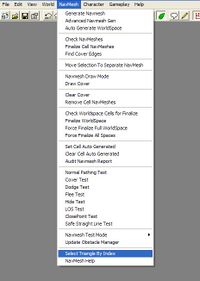
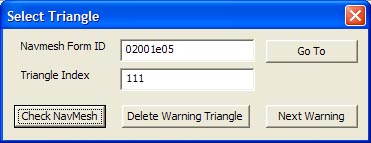
If you get this warning, you need to bring up the Select Triangle by Index dialog. You can do this by pressing the Find Triangle button ![]() on the Navmesh Tool Bar, or by pressing CTRL-F, or by selecting Select Triangle Index under the Navmesh drop down on the Main Menu Bar (pictured below):
on the Navmesh Tool Bar, or by pressing CTRL-F, or by selecting Select Triangle Index under the Navmesh drop down on the Main Menu Bar (pictured below):
Once this dialog is up, select Check Navmesh.
A warning pops up showing how many triangles were found and asks if you want to delete all of them.
Choosing Yes will delete all of the problem triangles, but now you have to go in and find where these triangles were located and patch them up (usually by creating a new triangle). We recommend you fix each error by hand, in which case you can select "No" to bypass. This will close the warnings dialog. Select Next Warning in the Select Triangle dialog. The render window camera will automatically snap to the problem triangle and highlight it for you. Most errors are easily solved by deleting the problem triangle and rebuilding.
In order to find the next triangle, you need to select Check Navmesh once again and repeat the process until all problem triangles have been corrected. When you've finished, save your plugin again. If no warning messages pop up, then your navmesh is good to go.
For more information about Navmesh cleanup click here. This link also explains finalizing which a later tutorial in this series also explains.
[edit | edit source]
Cover edges store data such as the height of a piece of cover, which NPCs use in combat and during regular pathfinding. To automatically detect cover, navigate to Navmesh>"Find Cover from the Main Toolbar, or use the ![]() button in the Navmesh Toolbar.
button in the Navmesh Toolbar.
Finding cover should take a couple of seconds. When it's done, you'll notice different colored edges in your navmesh. Each color represents different cover heights. The navmesh should look similar to that pictured in Fig 2a below after you've generated cover.
To get a good visual of what kind of cover is in your level, simply click on the Navmesh Menu Button on the Main Tool Bar and select Draw Cover, as pictured in Fig 2b.
A color-coded, 3D representation of the cover in the level will appear, as pictured in Fig 2c below. Notice the black bands on the sides of some of the cover. This is telling you that an actor will use that cover and shoot from that side (the black band side).
Navmesh can also contain other useful data such as marking navigable ledges, areas submerged in water, and more. Cover data can also be manipulated manually to tailor For a more detailed explanation of cover, click here.
With our navmesh complete, actors will be able to navigate the space and take cover during combat. That being the case, the next stage in this tutorial series is to begin placing NPCs and setting up their behavior.
