Bethsoft Tutorial GECK Setup
Installazione/Download
- Scarica e installa l'ultima patch disponibile qui
- Scarica il G.E.C.K. qui
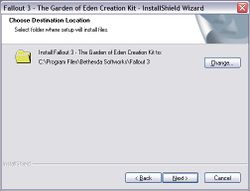
- Decomprimi il file e avvia l'installazione del G.E.C.K.
- Una volta avviato, assicurati che la directory di installazione del G.E.C.K. coincida con quella di Fallout 3.
- NOTA BENE: Se usi la versione di Fallout 3 per Steam, la directory di installazione è la seguente:
C:\Program Files\Valve\Steam\steamapps\common\Fallout 3
Crea il tuo Plugin
- Lancia GECK.exe dalla cartella d'installazione di Fallout 3
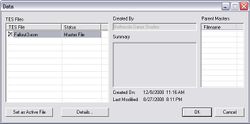
- Dalla barra degli strumenti principale, apri File>Data
- Seleziona "Fallout3.esm" cliccando due volte e poi clicca su OK per continuare
Caricare il file .esm può richiedere diversi minuti. dovresti riuscire a vedere la percentuale di caricamento nella parte bassa della finestra del G.E.C.K.
- Una volta caricato, premi 'Save'

- Poichè non è attivo nessun plugin, ti sarà richiesto di crearne uno
- Scegli un nome per il nuovo file *.esp e clicca OK per salvare
Se hai intenzione di proseguire con questa serie di tutorial, ti consigliamo di salvare il plugin con il nome "Vault74.esp".
- Da questo momento, dovrai settare questo plugin come attivo quando carichi il file Fallout3.esm
- I cambiamenti verranno salvati sul file attivo. Questo sarà il tuo mod personale.
- Possono essere caricati più di un plugin, ma soltanto uno può essere quello attivo.
- Chiudi il G.E.C.K. andando su File>Exit, impareremo come caricare il nostro nuovo plugin (.esp file)
Loading and testing your plugin
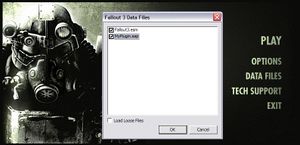
- Load the Fallout 3 Launcher, but don't hit PLAY.
- Choose "Data Files" from the launcher
- The new plugin you created should be available on the next screen, with an empty checkbox. Check it and click OK.
Don't see your .esp file? Verify that you installed the GECK to the same directory as your retail installation of Fallout 3. The file should have been created in a \Data sub-directory in that directory. This is where the launcher looks for data files.
Under Vista, if you are not running as Administrator, the data file may have been created in a shadow directory (with a name like "\Users\Me\AppData\Local\VirtualStore\Program Files\Bethesda Softworks\Fallout3\Data"), where it is visible to the GECK but not to the Fallout3 launcher. You can avoid this by always running the GECK as Administrator or by modifying the USERS permissions for the Fallout 3 directory ONCE.
- Fallout 3 will now load your plugin file when the game is launched.
There's not much point to running the game with your new plugin yet, however, since there's nothing in it. Let's exit the launcher, fire up the GECK again and get started building our first Vault location.


