Difference between revisions of "Bethsoft Tutorial Lighting"
imported>Henning m |
imported>DragoonWraith m (Protected "Bethsoft Tutorial Lighting": these can be edited, but shouldn't be moved [move=sysop]) |
(No difference)
| |
Latest revision as of 01:48, 11 January 2009
Lighting in the GECK[edit | edit source]
Introduction[edit | edit source]
Lighting can often be an underrated factor in taking a good level and making it great. Not only does lighting set a mood, it’s also essential for helping a player navigate through a worldspace. It’s great for giving subtle cues to the player by highlighting doors, loot, and general points of interest.
In this tutorial you will learn the basics of lighting and placing particle and ambient effects.
Before we get started, here are some hotkeys you’ll use frequently while lighting:
| Hotkey | Function |
| A | Toggle global lighting on and off. |
| M | Toggle editor markers. |
| S | (held) Resize light radius. |
| L | Toggle light radius markers. |
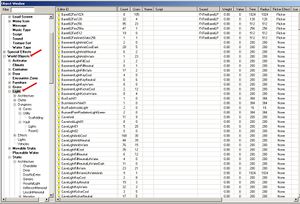
All of the lights are located under the World Objects directory in the object window.
Lighting Conventions in the GECK[edit | edit source]
You will generally find lights grouped together via location or kits, such as office, utility or cave. For the tutorial though, we’ll be placing lights and effects via the object palette.
With some exceptions, our lights use the usual naming conventions:
Ambient[edit | edit source]
(eg. Vault87Amb): Used for low lighting situations where an obvious lightsource is not present or necessary. I often used this light to help simulate bounce lighting you’d get from reflected light.
Fill[edit | edit source]
(eg. Vault87LightFillYellow): This is a basic light that would have a light source. It’s probably the most commonly used light version in the game, often giving adequate light without being too bright.
Key[edit | edit source]
(eg. Vault87LightKeyNeutral): A fairly bright light, useful for something like a spotlight. These are useful for highlighting things you would like to draw the player's attention to.
Kicker[edit | edit source]
(eg. Vault87LightKickerNeutral)The brightest light. These should be used sparingly, as they can blow out the lighting where they are placed.
Color Shifts[edit | edit source]
Additionally, you’ll see many lights that are cool, neutral, or warm and these are color shifts used to give a consistent and different feel to a level or areas within a level. It’s generally good practice to keep your light colors the same, meaning not using cool and warm lights right next to each other, although artistic intent is always up to the user.
Lighting Vault 74's Galley[edit | edit source]
We’ll be lighting the galley, the large, two-floor room in the center of the level. I’ve created an object palette for this tutorial, so download and load up this Vault Lighting Palette.
Refer here for more information on the Object Palette. This tool was also covered in the Cluttering Tutorial, earlier in this tutorial series.
Placing and Scaling Lights[edit | edit source]
Within the object palette, find and select LightCeilingVaultR01on, then, Ctrl+Alt+left-click on the ceiling to place the light fixture. This adds a visual source for the light, but does not cast light itself so we’ll do that next. Select Vault87LightFillWarm from the object palette, and Ctrl+Alt+left-click directly on the light fixture to add a light directly underneath it. The light has been added and you’ll see a bulb-shaped editor marker surrounded by a light radius sphere, indicating the radius of emitted light, and how much geometry the light is hitting. You need to be careful about performance here, and we’ll get into that later on.
If you cannot see the light-bulb shaped editor markers, you may have marker geometry turned off. Try pressing the "M" hotkey to toggle this option. Likewise, if you don't see the wireframe radius around light markers, you may need to toggle the "L" hotkey.
You'll need to be sure that the lighting preview button in the main toolbar is active to see how your lights affect the space. This function is also bound by default to the "A" hotkey
The newly placed light is using its default radius. To avoid the circular hotspots you currently see on the ceiling we’ll adjust both its position and size. With the light selected and holding the "Z" key to constrain it’s movement to the vertical Z-Axis, position the light a little underneath the light fixture. Hold the "S" key and scale the light's cast radius by moving the mouse up or down to expand or shrink the radius. In this case we want to nearly double the size of the radius.
Optimization Tip: Each light that casts on a piece of geometry effectively doubles the rendering cost of that piece. We'll cover performance in more detail later in this tutorial and the next.
Using FX and Emittance[edit | edit source]
Next, we’ll add an FXglow object, which gives the illusion of a soft glow around the light. From the object palette, select FXLightBeamW02, and add it into the scene by Ctrl+Alt and left clicking on the light fixture. It’s a little big, so much like the light, you’ll move it down and resize it until it fits comfortably around the light fixture.
This and Many other FX objects can be found in the Object Window under World Objects>Static>Effects>Ambient
You’ll notice the glow is white, and doesn’t really match the color of the lighting. This is because we haven’t assigned its external emittance. Double click the glow to bring up the reference properties dialog. From there, select the Emittance tab.
You’ll see two fields, one for Interior Light, one for Exterior Light. Whatever you choose here will transfer it’s color and brightness properties to that selected effect. With this new tool, you can change the color and brightness of particles, glows, light beams, and even special static objects such as windows. A good rule of thumb here is to choose an emittance that matches the value of the immediate lights. For instance, if I’m using a warm light source, then I will choose that same light or one of similar color to keep a consistent and believable color palette. In the interior light field, select Vault87LightKickerWarm, to assign that brightness and color to the glow.
It’s a little unbelievable that one small light will illuminate such a large area, so we’ll select the fixture, light, and glow as a group and use Ctrl+D to duplicate them into another light. Do this twice and reposition them until you have a row of lights properly lighting the galley.
The last thing we need for ambiance is a particle effect. From your object palette, select FXSmokeWispsLg2x1, and add it in the center of the room, on the floor. You’ll see a box containing a static particle field added into the scene. You can see these particles animated in GECK by clicking the Havok Sim button in the menu.
Remember how we set the external emittance for the glow? We’ll do that again for the fog. Double click the fog to bring up the reference window. Go to the Emittance tab and in the interior light field assign it Vault87LightKeyWarm. This gives it a color similar to the lighting.
Performance and Optimization[edit | edit source]
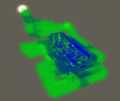
Performance is always a consideration when lighting an area, we can check our light density with a special shader that highlights where trouble areas might occur. Let’s open up the preferences menu and go to the Shaders tab and toggle the Debug # of lights box.
Your level should now render in bright colors. Green areas will run the fastest, while most areas that are lit within acceptable ranges will appear in shades of blue. Problem areas are highlighted in shades of purple, while red indicates areas likely to cause major performance problems.
Note that shading occurs on a per-piece basis, not per-polygon. See the Performance Tip above for more information on this. Be sure to look at your level pulled back to make sure you aren’t occluding lights in the viewport.
Note the third image below. Five lights were clustered in the galley as an example of the density shader reporting excessive lighting.
Keep in mind that the shader passes are merely telling you how many lights are hitting an object, but there will be many different factors such as scene density, AI, number of loaded textures, etc. that ultimately determine overall performance in an area, and this should be used as a guideline, not an absolute. The next tutorial in this series will cover performance and optimization in-depth.
Occasionally you may wish to light an area twice. For instance; the player can activate a generator, replacing dim, cool lighting with bright and warm lights throughout an area. Properly set up, those sets of lights will never be enabled at the same time in-game, but the density shader has no ability to detect this. In these cases it is best to set up your alternate lighting schemes in a duplicate cell and merge them with paste-in-place in after doing performance testing in each area separately.
That’s it, you’ve just finished lighting and adding effects to a room!


