Creating Primitives
Overview
The GECK features new, editor-created primitives which can be non-uniformly scaled. These find their primary use in the creation of trigger volumes, multibounds, and occlusion planes. They carry several features and benefits over the old, art-based triggers.
- GECK-defined color
- non-uniformly scalable
- ActorOnly flag
- ProjectilesOnly flag
- More processor efficient
This is a quick tutorial on the creation of these primitives.
Quick drawing
To begin primitive drawing, click the icon for the appropriate type of prim. This tutorial will use a trigger cube type. The basics of creation are similar for all types.
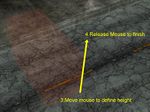
Now, click in the render window at the point from which you'd like to begin drawing. Your cursor movement will now define the XY bounds of the cube. When you've got the shape you want, click again to define the XY plane. Your cursor movement will now modify the height of the prim. Click to finish the shape. Don't worry about getting it perfect the first time; we can scale it later.
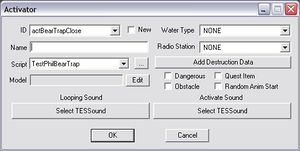
After clicking to define the Z height of the prim, you'll automatically be prompted with an activator base object properties dialog. The most important feature to note here is the ability to create an entirely new base object by clicking the "New" box. Otherwise, you'll choose the base object which the reference object you've just created will refer to. Note that triggers are activators.
If your primitive isn't visible, you may have marker viewing turned off. Try toggling the "M" key.
Special Features
Activators now feature a "Primitive" tab. Here you can perform several functions:
- Change Primitive type
- Boxes and spheres are available.
- Toggle the ActorZone flag
- Most triggers will use this flag to prevent checking collision with non-actors. This will speed up performance and reduce the need for specialized script conditions.
- Toggle the Projectile flag
- Used for triggers which can be activated by a projectile. Untested feature.
- Manual-define Origin
- Manual-define Scaling Bounds
- Define color
- Color can either be defined with RGB values or the windows color picker. We made a decision not to globally define trigger colors (ie: red = trap trigger) in favor of letting designers individually determine their own schemes to suit the need of the space and personal preference.
Using Non-Uniform Scaling
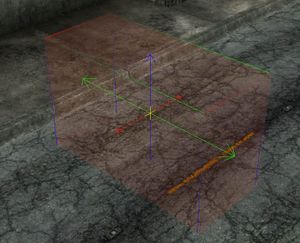
With a primitive selected, hit "S" to enter scaling mode. You'll notice a gizmo appear within the bounds of the prim. (If not, try rotating to camera to update the render window) The gizmo features two handles for each 3D axis. Grab a handle/arrowhead and drag it to scale in that direction and fine-tune the shape of your prim.
Primitive Gizmos are unique in that they can be picked through static geometry. Your cursor will change to show what action you can perform. With a primitive selected, a basic 4-way cursor will appear if your cursor is above the primitive and ready to move the selected object. Hovering over a gizmo handle will change to a boxed 4-way cursor, meaning you can grab and scale the handle.
Prims can also be rotated just like any other activator.
Triggers will use more processing power as they become larger. Try to scale to the minimum size that ensures the triggering that you intend.
Exceptionally thin triggers run the risk of not being activated, especially if performance is poor and on low-end hardware.


